
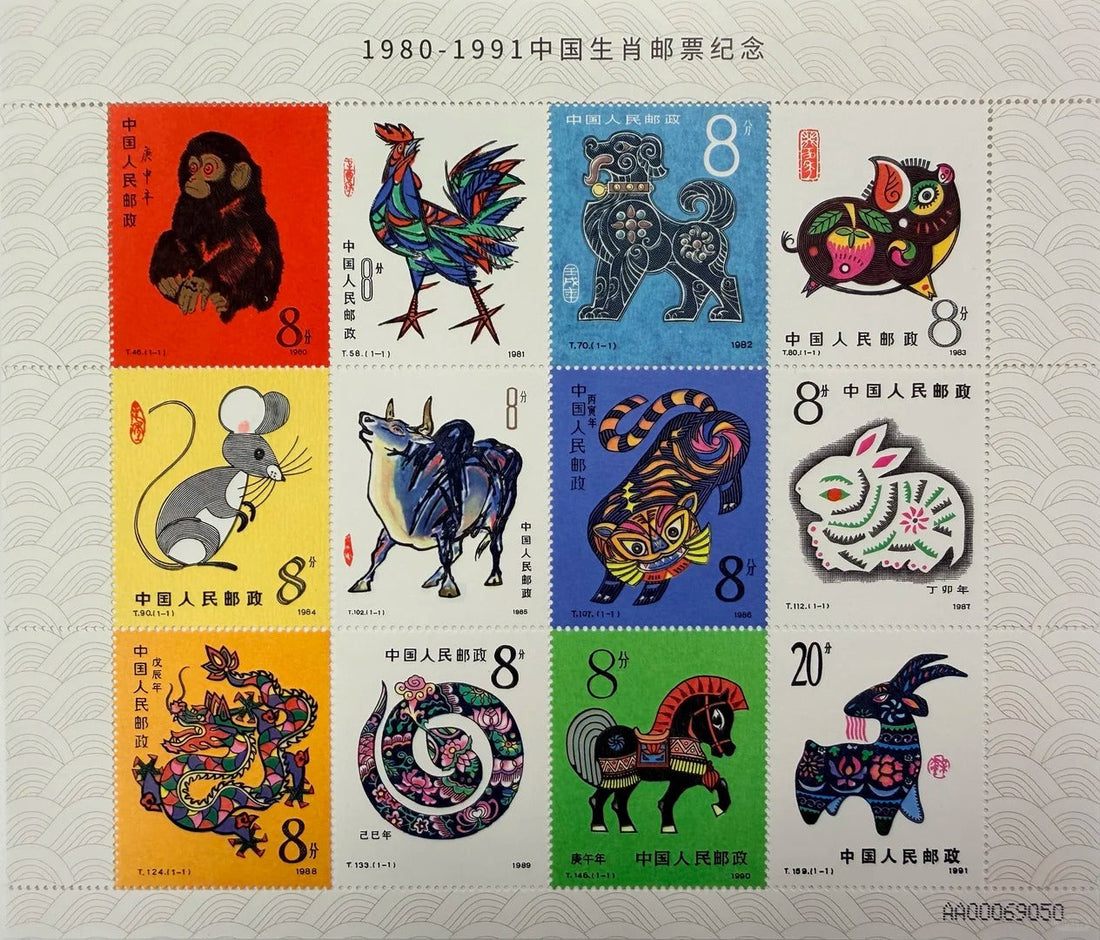
Review zodiac stamps in a fixed sequence
Begin with the issue code, face value, design title and issue information. Then distinguish a loose single, complete set, souvenir sheet or full sheet, keeping both descriptions under the same item number.
Describe foxing, mould spots, creases and missing perforation tips in the condition notes. Make the checklist repeatable by another person, without promoting an unconfirmed detail into a variety, period or result.
Confirm the measuring tool and unit, and add the date of examination. A blank may carry a reason; it should never be completed by guesswork.
Take overall views before damage close-ups
When original packaging remains, differences in sheen or paper thickness may relate to original gum, adhesion, hinge remnants, thinning or regumming. Photograph the reverse without water or finger pressure, and explain the effect before any contact.
Separate a damp or mould-marked album leaf from unaffected paper and maintain gentle ventilation. Avoid heaters, direct sunlight and cleaners, then use the checklist to identify anything still missing.
Give the overall images, detail photographs, measurements, packaging and documents one shared identifier so that later additions cannot migrate to another stamp.
Leave unknown details open
For a group of stamps, recheck the issue year, code, denomination and number in the complete set. Sort singles, blocks of four, full sheets, souvenir sheets and used covers into distinct groups while retaining each item's number.
Photograph an album from its cover through every numbered leaf, preserving the original order. If damp adhesion appears, stop turning pages and do not force a stamp loose.
Any issue, printing or historical statement needs a cited source and consultation date. Old labels, recollections and web pictures are research aids, not substitutes for visible evidence.
Give every philatelic item its own notes
For a zodiac stamp, write down the working name, legible wording, design, dimensions or weight, current mount and visible condition. Mark unclear details for comparison, and keep each observation tied to its identifier.
Stamps sharing one subject can still differ by year or format. Verify the issue code, paper, printing and complete-set count separately instead of relying on the design alone.
Look for gaps before finishing
Handwritten notes, old packets and album order may help trace provenance. If protective film has deteriorated, photograph the leaf structure first rather than pulling the strip back and forth.
Photographs can establish broad grouping and conspicuous faults. Paper, fine repairs and areas concealed by a mount may still require direct inspection before any conclusion is reached.
A practical sequence for zodiac-stamp checks
Start with the complete-set count and sheet margins. Transcribe supported issue codes, values, design titles and issue information before examining gum, hinge remnants, thinning or regumming. A name not demonstrated by the images stays open, which helps prevent two items being mixed.
Safely document foxing, mould, creases and missing perforation tips before adding complete dimensions and close-ups of specific design areas. Describe any restriction created by packaging or camera angle, then confirm that all attachments bear the correct identifier.
Keep visible observations apart from old labels, certificates and recollections. If the two accounts conflict, retain them side by side. Match foxing, mould, creases and perforation loss back to the appropriate stamp.
Before requesting an opinion, check quantity, enclosures, packaging and unresolved details. Any fee, examination condition or handover term should be set out item by item after the material can be seen. Finish with the issue code, face value, design title and issue information.
For a zodiac-stamp enquiry, bring the original packaging and current notes. Point out any gap in the album sequence or storage history so the examination can begin in the right place.
